Choose the Right Location for Your Next BlumSafe
Basically, the BlumSafe is meant to be installed either in the wall or in the cabinetry. If you have interior wall space for a 16” by 30” painting, you have a place for the BlumSafe. However, just to be sure, please take a moment to read the notes below or look at the BlumSafe installation instructions or video.
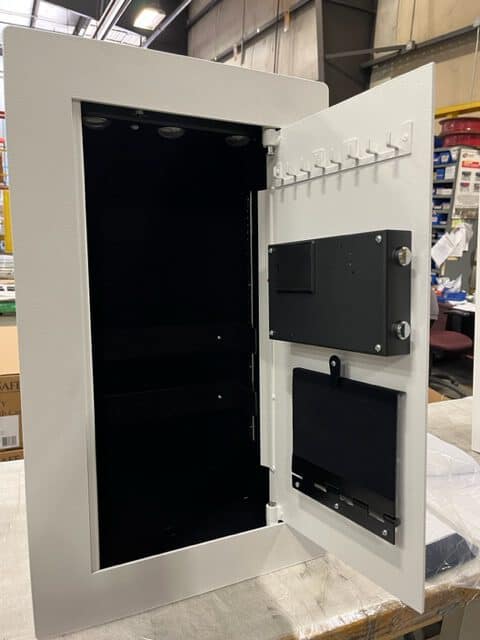
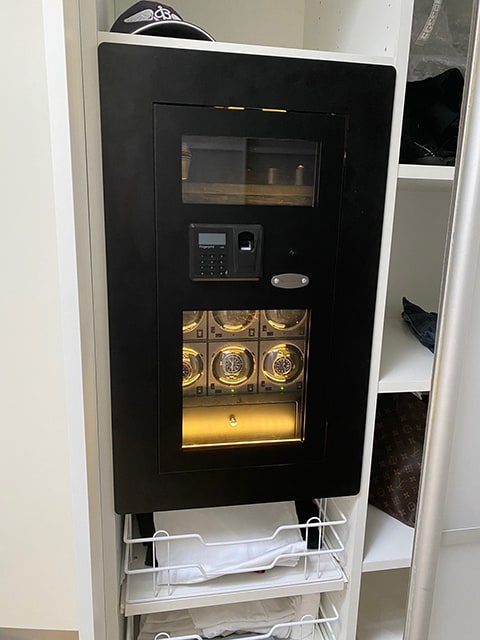
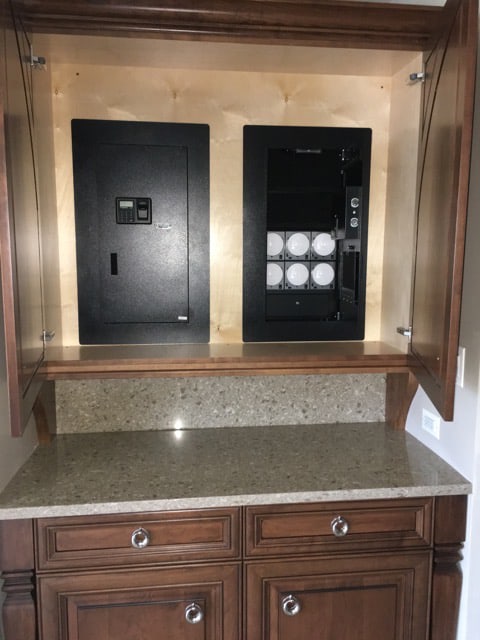
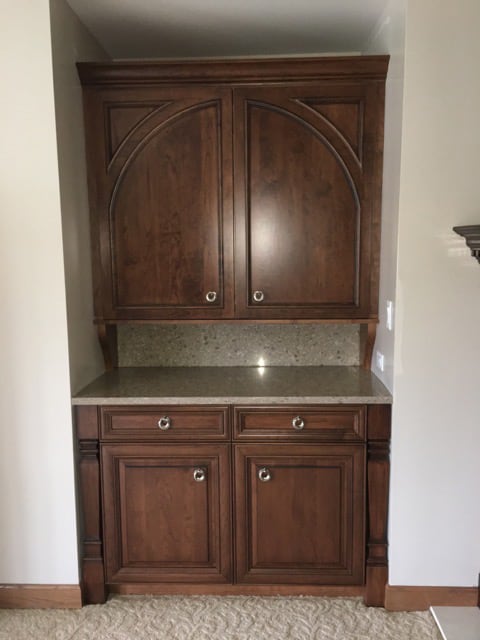
If you don’t have the wall space for mounting your BlumSafe, you can also mount it in cabinetry, like many of our customers have done, as shown in this photo slider, or you can purchase our Frame accessory, which permits you to use your BlumSafe in a 2″X4″ stud wall partially recessed into the wall.
For mounting in a wall, preferably an interior wall, the BlumSafe is designed to be installed in one of three configurations:
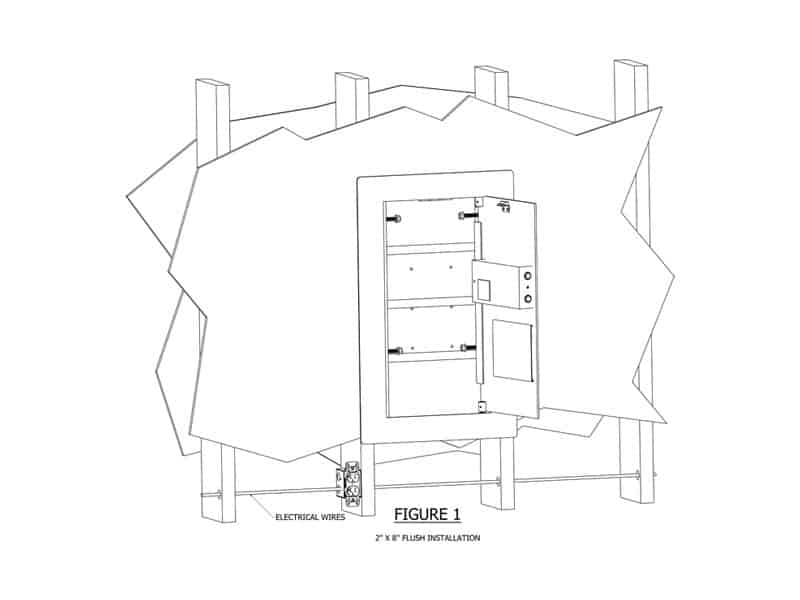
Flush-Mounted in a 2”X8” or Deeper Wall
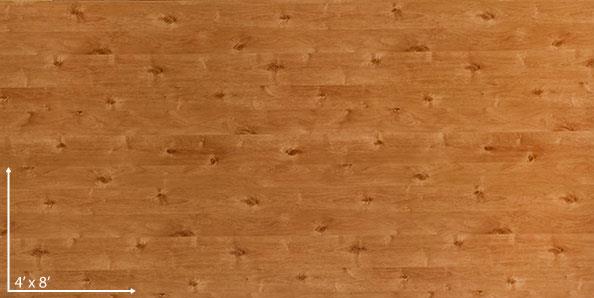
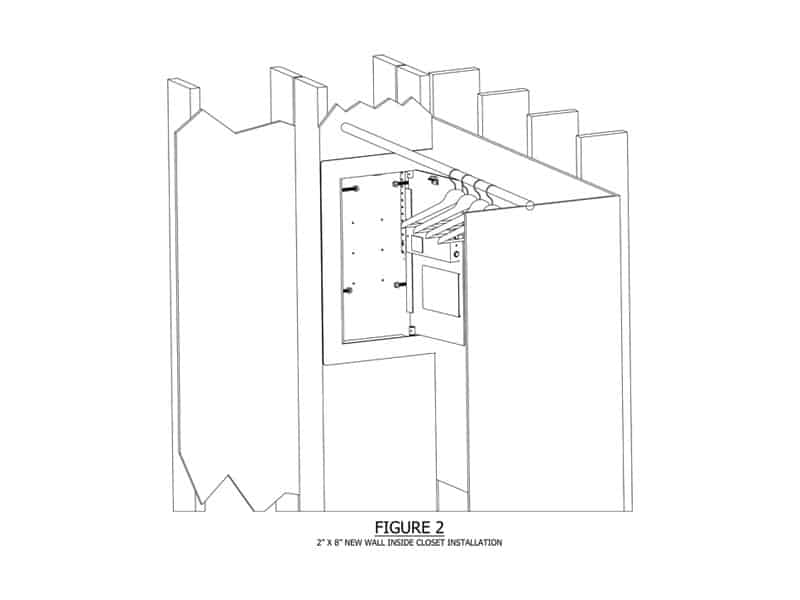
It will fit flush in a wall that is constructed using 2” X 8” or greater vertical structural members (also known as “studs”), where the studs are placed 16 inches on-center (“O.C.”) (see Figure 1). Most interior walls, however, are typically made out of 2”X4” wood studs placed 16” O.C. If this is your situation you mat wish to build a 2”X8” sidewall for your BlumSafe in a closet or the corner of a room (Figures-2). Otherwise, you have two other choices for mounting the BlumSafe in a 2”X4” wall:

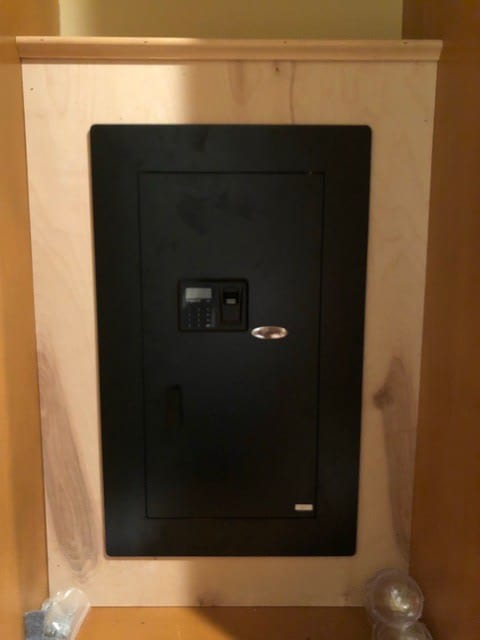
Flush Mounted in a 2”X4” Wall, With Rear Projection.
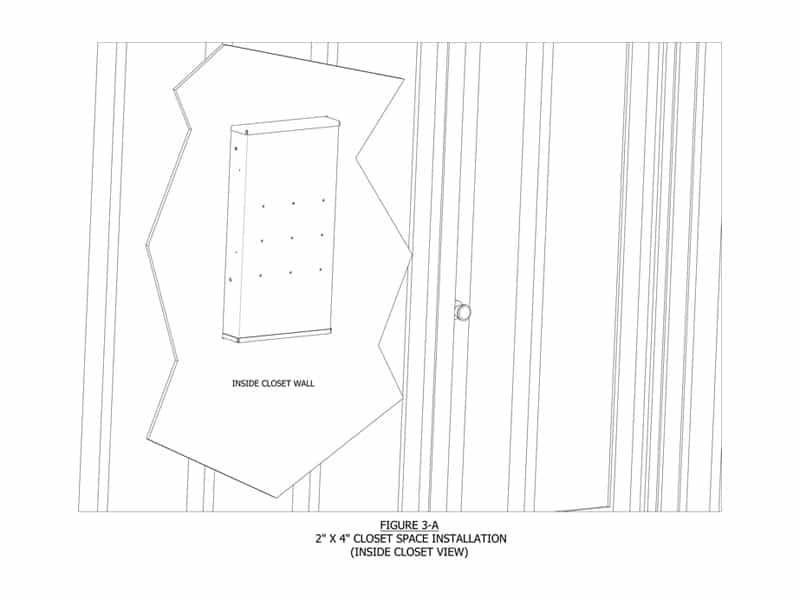
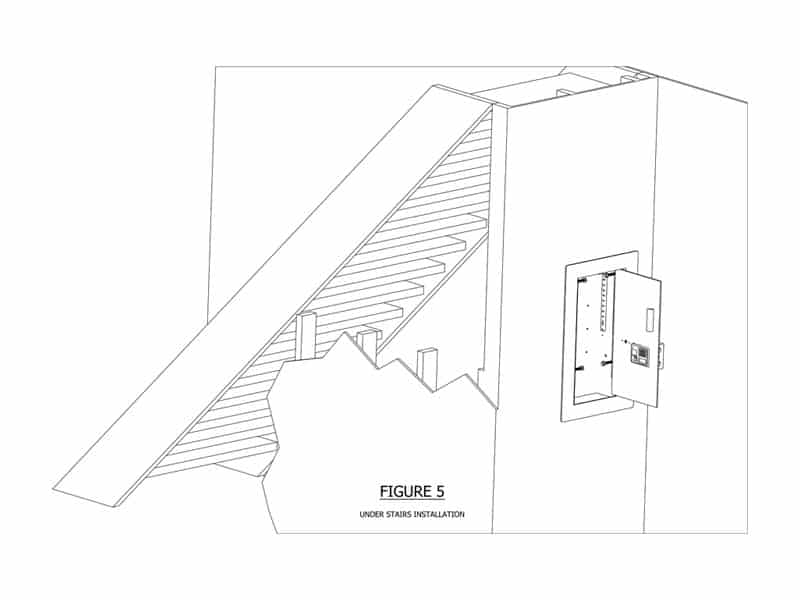
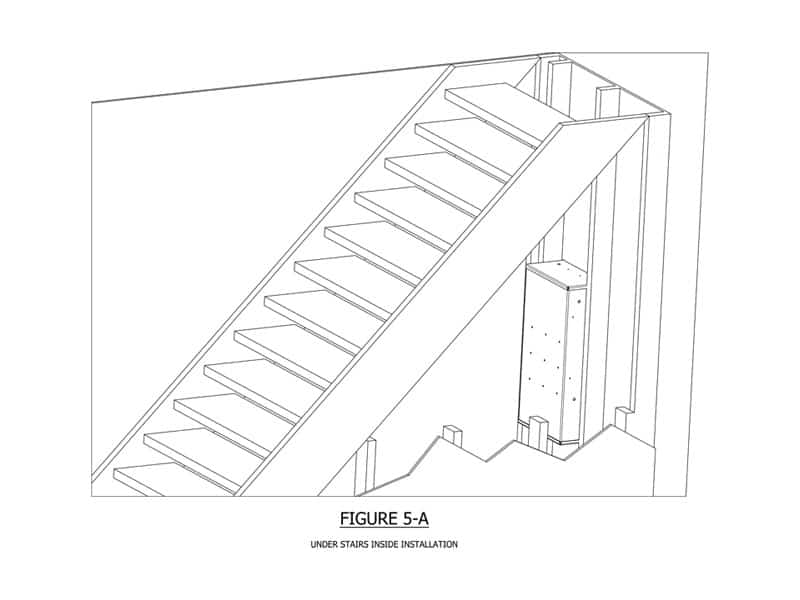
Mount the BlumSafe flush in a 2”X4” wall section where there is unused space in the wall behind the BlumSafe, so the back of the BlumSafe projects through that back wall, for instance, into closet space (Figures 3 and 3A ) or dead space under a stairway (Figure 5), or

Surface Mounted with Trim in a 2”X4” Wall.
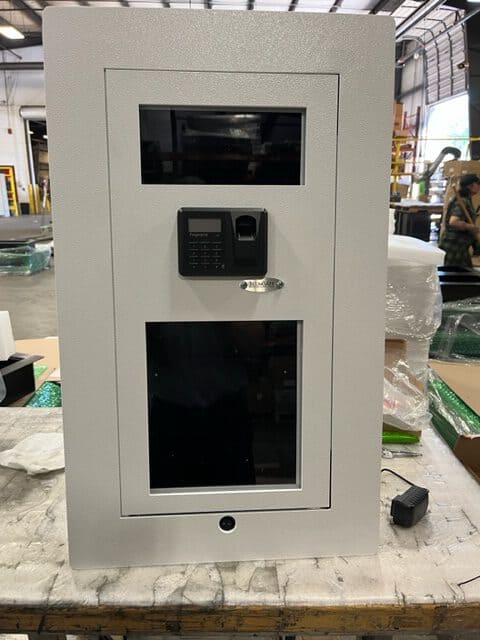
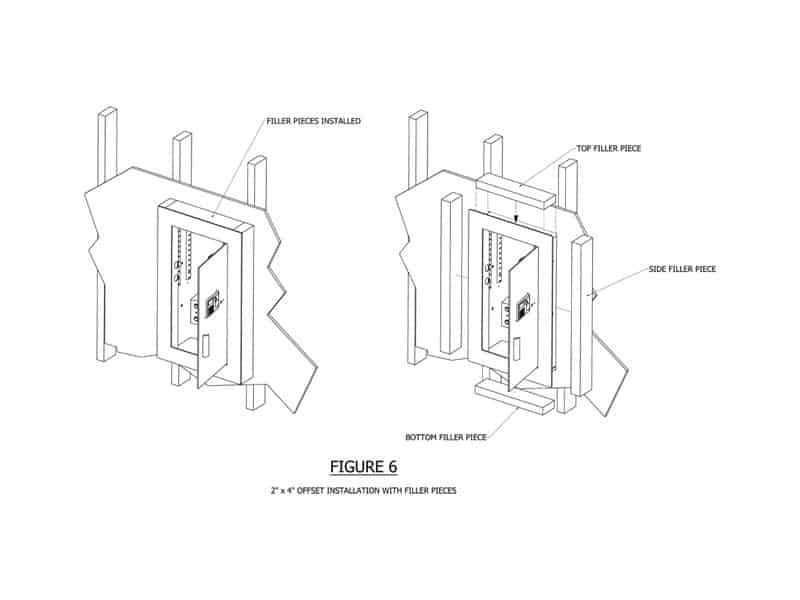
Mount the BlumSafe in a 2”X4” wall section with the front of the safe projecting from the surface of the wall by about 3.5”, and either purchase our Frame accessory or cut four pieces of wood commonly used for 4” studs (which is actually dimensionally 3.5” deep) to use as trim pieces to frame underneath and around the front of the safe (see Figure 6). Holes have been predrilled in the sides of the BlumSafe to permit secure mounting in this installation.
Avoid Stud Pockets Containing Pipes and Wiring.
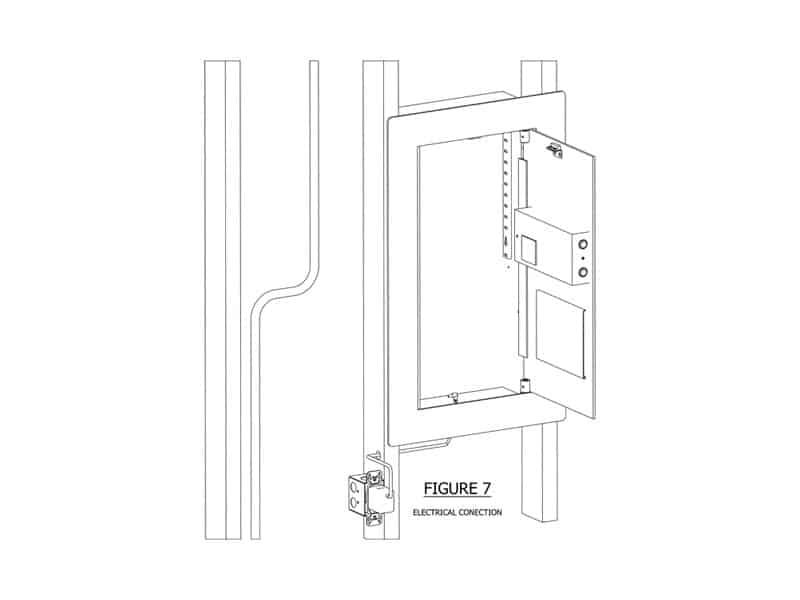
The only other factor to consider in choosing the correct spot for your safe is that you want to avoid placing the safe in a stud pocket (i.e., the space between two studs) that has pipes or electrical wiring, which might get in the way of the installation of your safe.
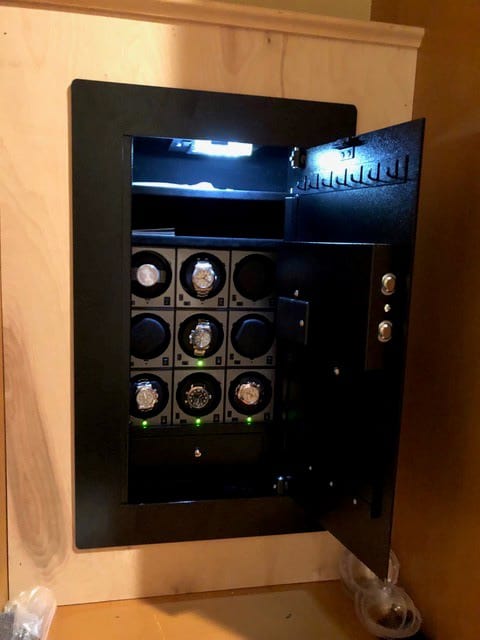
However, if you are able to locate the BlumSafe in a stud pocket adjacent to one containing an electrical outlet, that will make connection to power for the winders very simple (otherwise, if your BlumSafe will have six or fewer winders, you can power your winders with an in-safe [battery box] from the product Page)(Figure 7).
With those considerations in mind, you should look forward to many years of satisfaction with your BlumSafe!